How To Lattice Pie Crust

How To Lattice Pie Crust
Table of Contents
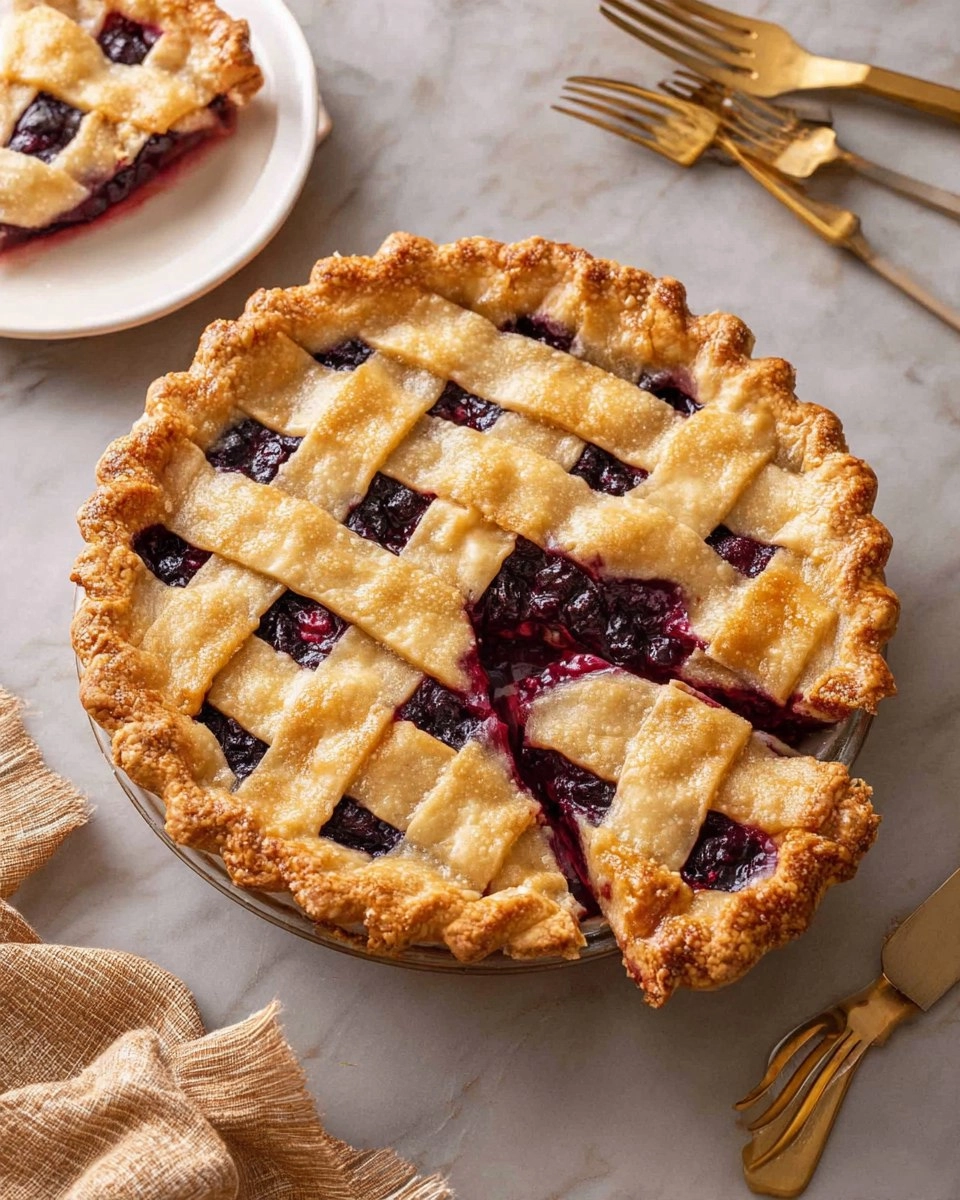
There’s something enchanting about a beautifully crafted lattice pie crust that can make any pie feel that much more special. The delicate crisscross of dough not only adds elegance but opens the door to golden, bubbling pie filling that tantalizes the senses. The smell of a pie baking in the oven is undeniably comforting; it stirs memories of family gatherings, sunny afternoons, and laughter shared over sweet treats. If you’ve ever admired a lattice pie and thought it was beyond your reach, I’m here to tell you that mastering this skill is entirely possible, and it’s much easier than you might think!
When I first attempted to make a lattice pie crust, I’ll admit I was intimidated. Yet, after one or two tries, I discovered that the process is not only satisfying but also kind of therapeutic. Once you get the hang of it, you can let your creativity shine—altering the width of your strips or trying out different patterns to suit your pies. So, grab your favorite pie dough and let’s get started on this rewarding journey of creating a stunning lattice pie crust that not only impresses your friends and family but is also enjoyable to make!
Why You’ll Love This Recipe
- Simple & Quick: This technique comes together swiftly, perfect for a last-minute dessert, taking only about 30 minutes of prep.
- Irresistible Flavor: A lattice crust enhances any pie’s aroma by allowing that rich, bubbling filling to peek through, making each slice a delight.
- Eye-Catching Appeal: The crisscross pattern elevates your pie’s presentation, making it the showstopper at any gathering.
- Flexible Serving: Perfect for seasonal fruit, savory fillings, and even as a sweet treat after dinner!
- Diet-Friendly Options: You can easily adjust the recipe to cater to gluten-free or dairy-free needs with alternative doughs.
Ingredients You’ll Need
- Pie dough: Use 2 discs for a top and bottom crust. You can make it from scratch (my personal fave) or grab a store-bought version that you love.
- Pie filling: Choose your favorite! Classic apple, cherry, or pumpkin are popular choices that pair beautifully with a lattice top.
- Egg wash (optional): 1 egg whisked with 1 tablespoon water or milk adds a golden sheen to your crust.
How to Make How To Lattice Pie Crust
- Roll Out the Dough: Start by rolling out one disc of pie dough into a circle or square larger than your pie pan, about ⅛-inch thick. A lightly floured surface will help prevent sticking.
- Score the Dough: Use a ruler or tape measure across the dough to score straight lines, spaced 1 inch apart, from edge to edge. These will guide your cuts for the strips.
- Cut the Strips: Cut along the scored lines to produce long, even strips, saving the longest ones for the center of your lattice.
- First Layer of Strips: Lay down 5-6 strips on top of your pie filling, ensuring they are evenly spaced and parallel.
- Fold Back Alternating Strips: Start with the second strip from one edge. Fold every other strip back toward the center of the pie, keeping those strips folded in half.
- Position the First Perpendicular Strip: Grab a strip from your remaining pile and lay it perpendicular to the parallel strips, close to the base of the folds.
- Return Folded Strips: Gently fold the strips back to their original positions so they lie on top of the perpendicular strip.
- Continue the Lattice Pattern: Fold back the other set of alternating strips and lay another perpendicular strip spaced about ¾ inch to 1 inch away. Unfold the strips back over it.
- Repeat the Alternating Process: Keep folding one set back, laying a cross-strip, and unfolding, working outward toward both edges until your pie is fully covered.
- Trim the Edges: Use kitchen shears to trim any excess dough from the bottom crust and lattice strips to about 1 inch beyond the edge of the pie pan.
- Seal the Lattice: Fold the excess dough up and over itself, pressing gently to seal the lattice strip ends to the bottom crust.
- Decorate the Edge: Create your preferred decorative pattern along the edge of the crust to finish it off beautifully.
- Chill and Bake: Freeze the assembled pie for 15 to 20 minutes to set it. Brush with egg wash if desired, then bake according to your pie filling recipe’s instructions.
Storing & Reheating
To keep your lattice pie crust fresh, store it at room temperature for up to 2 days. If you need to store it longer, refrigerate it in an airtight container for up to 5 days. You can also freeze your pie (baked or unbaked) for up to 3 months. Wrap it tightly with plastic wrap and aluminum foil to prevent freezer burn. When you’re ready to enjoy, reheat the pie in the oven at 350°F for about 15-20 minutes until warmed through. Note that while the flavors should remain intact, the texture may soften slightly upon reheating.
Chef’s Helpful Tips
- Avoid rolling the dough too thin; it can lead to tearing. Aim for a thickness of ⅛-inch.
- If your dough becomes warm while working or sticky, chill it for a few minutes in the fridge to make it easier to handle.
- Rotate your pie while you’re cutting the dough strips to maintain precision and keep an even shape.
- If using fruit fillings, ensure they are not overly juicy to prevent leakage through the lattice.
- Try using an egg wash for extra gloss on your crust, giving it that bakery look!
- Consider making the pie dough ahead of time. Chill it for up to three days in the fridge or freeze it for up to three months before using.
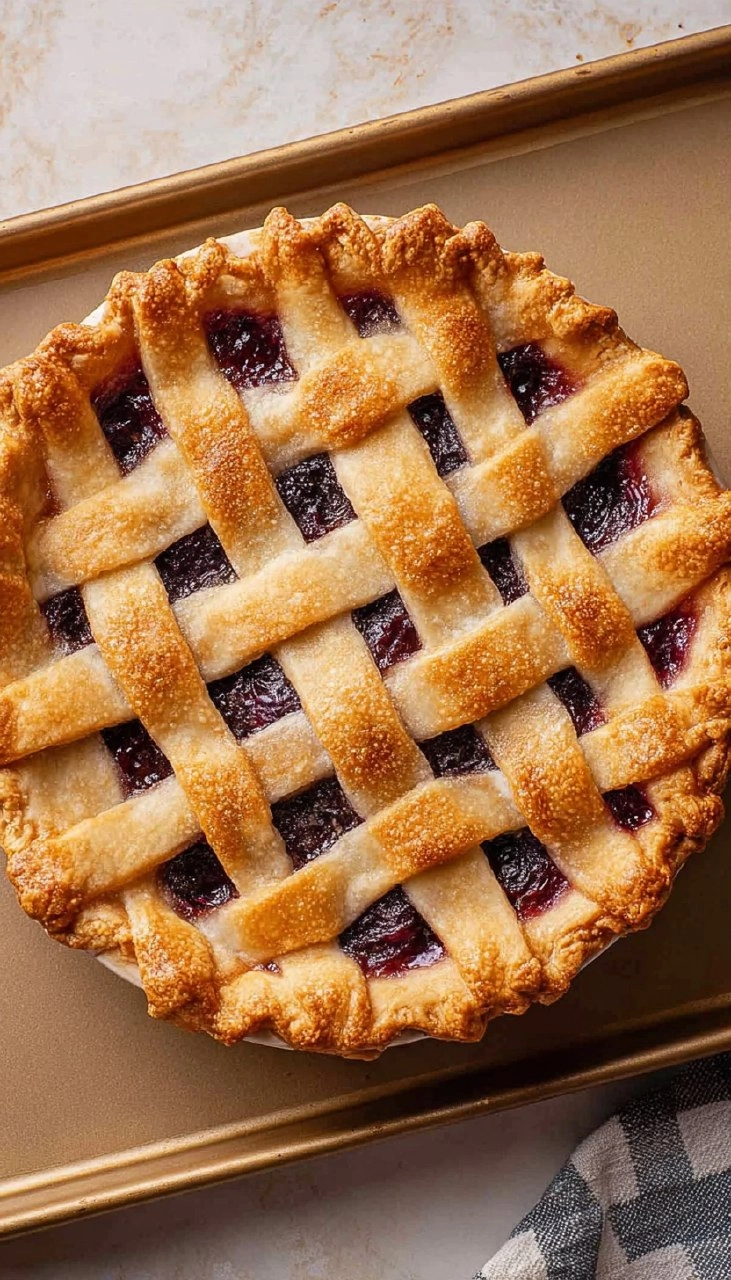
There’s so much joy in creating your own lattice pie crust; it’s a visual feast as much as it is a culinary delight. Not only does it enhance the overall presentation of your dessert, but it also gives you a chance to experiment with flavors and designs that suit your tastes. You may even find yourself wanting to try different fillings or experimenting with the dough itself. Whether you’re making a comforting apple pie or a decadent cherry filling, your lattice creation is sure to impress!
Recipe FAQs
Can I use store-bought pie dough?
Absolutely! Store-bought pie dough is a fantastic time-saver and can yield great results. Just ensure it’s large enough to cut into strips for your lattice.
How thick should the pie crust be?
The dough should be rolled about ⅛-inch thick for optimal structure and flakiness. This allows for a sturdy lattice without being overbearing.
Can I make this lattice crust ahead of time?
Definitely! You can prepare the lattice crust and freeze it unbaked for up to three months. Just bake it straight from the freezer, adding additional time if needed.
What fillings work best for a lattice pie crust?
Classic fruit pies such as apple, cherry, or berry fillings work wonderfully with a lattice crust, as well as cream pies like chocolate or coconut. Just remember to avoid overly wet fillings to maintain the integrity of the crust!
PrintMore Desserts & Appetizers Recipes
- Blackberry Pie
- Apple Pie
- Apple Blueberry Pie with Flaky Lattice Crust
- The Best Apple Pie
- Blueberry Peach Pie
Did You Enjoy Making This Recipe? Please rate this recipe with ⭐⭐⭐⭐⭐ or leave a comment.
📖 Recipe Card

How To Lattice Pie Crust
- Prep Time: 30 minutes
- Cook Time: 45 minutes
- Total Time: 1 hour 15 minutes
- Yield: 1 pie 1x
- Category: Desserts & Appetizers
- Method: Baking
- Cuisine: American
Description
This lattice pie crust recipe is a delightful blend of flaky pie dough and your favorite filling. Crafted easily, it adds a stunning touch to desserts, making them a visual and tasty treat. Perfect for those seeking a homemade touch to their pies!
Ingredients
- 2 discs pie dough
- 2 cups pie filling
- 1 egg whisked with 1 tablespoon water (for egg wash)
Instructions
- Roll out one disc of pie dough into a circle or square larger than your pie pan, about ⅛-inch thick.
- Use a ruler or tape measure to score lines 1 inch apart across the dough with a bench scraper or knife.
- Cut along the scored lines to make long parallel strips, keeping the longest strips for the center.
- Place 5-6 strips on top of the pie filling, spaced evenly and parallel to one another.
- Fold back every other strip from one edge towards the center, leaving them folded in half.
- Lay a strip from the remaining pile perpendicular to the parallel strips, close to the fold's base.
- Return the folded strips back to their original position over the perpendicular strip.
- Fold back the other set of strips, placing another perpendicular strip ¾ inch to 1 inch away, then unfold the strips on top.
- Continue alternating by folding back one set, laying a cross-strip, and unfolding until reaching both edges.
- Trim excess dough and lattice strips to about 1 inch beyond the pie pan edge with kitchen shears.
- Fold the excess dough up and over itself to seal the lattice ends to the bottom crust.
- Press a decorative pattern on the crust edges to seal it.
- Freeze the assembled pie for 15 to 20 minutes, brush with egg wash if desired, and bake.
Notes
For a golden finish, brush the crust with egg wash before baking.
Ensure your dough is cold to make cutting strips easier.
Use various fillings such as fruits or custards for different taste experiences.
Nutrition
- Serving Size: 1 slice
- Calories: 210
- Sugar: 5g
- Sodium: 120mg
- Fat: 10g
- Saturated Fat: 3.5g
- Unsaturated Fat: 6.5g
- Trans Fat: 0g
- Carbohydrates: 28g
- Fiber: 1g
- Protein: 2g
- Cholesterol: 30mg